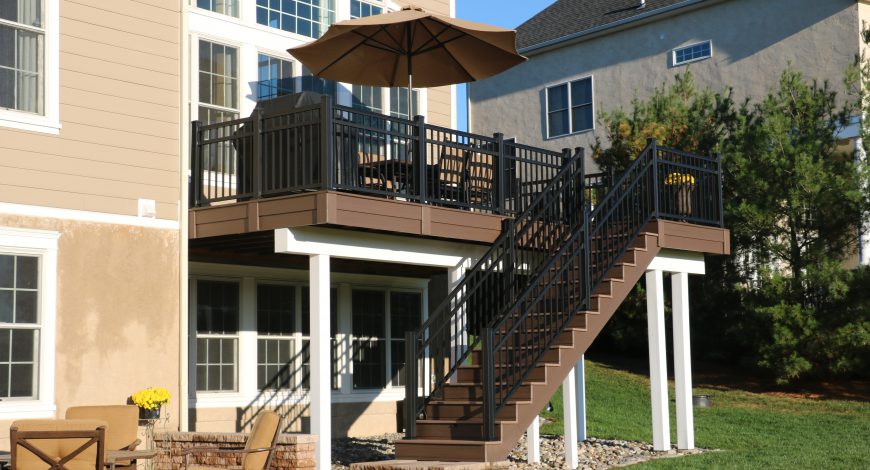
Building your dream deck can be an overwhelming experience, and you may not know where to start. If you break down the deck building process into smaller steps, it’s easier to digest and you might find that motivation to finally start! That’s why we’ve created this guide to help homeowners like you better understand how to build a deck. Click the links above to jump to each step! The first step to building your dream deck is to find a deck contractor. You’ll want to find someone who specializes in deck construction and has plenty of experience. Sure, you could try a DIY deck or general handyman to construct your deck but without experience, you could end up with a shotty deck built with the wrong components and not up to building code. Search for deck contractors online and pick out a handful of experienced builders to contact. Once you find a few contractors to contact, there are several questions you should ask in your first meeting. Questions like, “What kind of fasteners and hardware do you work with?” or, “How long will it take to build my deck?” will help you understand the quality of service that this contractor will bring to your deck. There are specific types of fasteners that should be used in all decks, as well as the option of hidden fasteners. You should understand what they use and how it affects the price. The time of completion varies depending on their work load and size of your deck. It could be finished in a week or take months. After you ask these questions, you’ll move onto quoting. You’ll need a general understanding of how large you’d like the deck to be and how far off the ground it will be. The contractors might give you a general estimate of how much it will cost before stopping by your property and providing their final quote. At this point, you can compare their quotes with their offerings to determine the best value. This might not always be the cheapest option, as the more expensive quotes might be using better materials or superior service. Every local municipality will have different regulations regarding the construction of a deck. These regulations include, but are not limited to, building permits, safety codes, and inspection requirements. You can do a little research ahead of building by visiting your municipality’s website or contacting the local zoning office. If you are working with a professional deck contractor, they’ll have experience navigating local ordinances. Some typical regulations you’ll come across might include requiring railings for a deck 30 inches or more above the ground. Another might be a maximum rise height of 7 ¾ inches and minimum tread width of 10 inches for stairs. These regulations are in effect for the safety of your family and you’ll need an inspector to stop by after the deck is built to ensure it’s safe. One more thing you should do is call 811 to determine where underground utilities are located on your property. Knowing this will help you understand where you can dig and where you cannot. The first plan you’ll draw up is a site plan. This is a drawing with your property boundaries, house, other major features, and your simple deck plan. This can help you conceptualize how your deck fits into your property but isn’t to scale. A site plan may be good enough to proceed if you are building a simple, rectangular deck. For more complicated decks, or if required by your zoning office, you’ll need to draw up detailed designs. These designs will scale out the various parts of your deck and you’ll need two perspectives, an overhead view and a side view. The designs will lay out the exact location of piers, beams, joists, footings, posts, railing, and any other structural elements. While planning, think about the layout of your deck. If you’d like to place your grill on the deck, ensure there’s space for it! Adding décor to your deck is a step later on in the process, but that doesn’t mean you shouldn’t be thinking of it now. You’ll also want to plan for all the structural options you’ll be adding to your deck. These include stairs, awnings, pergolas, and/or gazebos. After the plans are drawn, you’ll need to submit them to the local zoning board for approval. Here’s where your research from the step above comes into play. Knowing your local regulations ahead of time will ensure that your plans are approved in a timely manner, without any revisions. After approval, you’re able to begin building. As you look to begin building your deck, you need to settle on the type of material for your decking. There are hundreds of options available, each with its pros and cons, but they all fit into four general categories: wood, composite, vinyl, or vinyl-wrapped composite. Once you decide, your contractor will likely order the material for you. Wooden decking comes in two varieties, hardwood decking and traditional, pressure-treated decking. The hardwood decking is naturally weather resistant, very durable, and has a natural beauty to it. On the other hand, it is expensive, needs treatment, and is a little more difficult to install. Traditional, pressure-treated wood is the most affordable decking material, can be stained any color, and is easier to install. This wood, however, requires much more maintenance and has a shorter lifespan. Composite decking was once a very popular option when it was first introduced in the 1990s. It has since been surpassed in quality by PVC, a.k.a. vinyl, decking. It does remain less expensive than vinyl, so if you’d like to save a few dollars on a non-wood option, composite is your choice. Keep in mind that composite decking will fade over time, need regular cleaning, and is less durable than vinyl. Vinyl decking is now the industry standard for durable, man-made decking. This decking made its first appearance in the early 2000s and quickly overtook composite. There are many color options available, it’s low-maintenance, and often comes with a lifetime warranty because of its durability. You will pay more for this option because of these amazing benefits and it can get hotter than other materials. Vinyl-wrapped, or vinyl-capped, composite decking is the best of both worlds for man-made decking. This is composite material wrapped in a vinyl shell. The composite core makes it cooler than pure vinyl decking. The vinyl wrap makes it more durable and easier to clean. It is slightly softer than vinyl and may scratch easier. You’ll also be paying the most out of all materials for vinyl-capped composite. With all your design complete, permits squared away, and materials bought, the construction of your deck begins! How long the build will take depends on how complicated it is. A simple deck could be constructed in under a week. A more complicated deck could take a whole month. The first step to every deck is attaching the ledger to your house and installing the posts. These are the key components for the rest of the frame to be built. The ledger gets attached to your home’s rim joist and then protected from the elements with weatherproofing. Then, using mason’s strings, you’ll mark the outline of your deck and determine where to install posts. Holes are dug, concrete is poured and cured, and posts are bolted to the bases. With the ledger and posts installed, the frame can be built, starting with the rim joists. These are installed using joist hangers attached to your ledger and posts. Then, you’ll attach the interior joists to the ledger and front rim joist, again using joist hangers. Lastly, beams are installed perpendicular to the interior joists. The final finishing touches include the trim, decking, railing, and staircases. First, railing posts need to be installed roughly every 5 feet, but your local code may vary. These get anchored to your rim joist. Then, trim boards are nailed to the rim joists with their finished sides facing out. Your decking will then be installed with a one-inch overhang of the trim board, nailing and/or gluing them down along the joists and beams. The railing starts with the bottom, typically installed 4 inches or less from the decking, but depends upon your local building code. The top railing is installed flush with the top of your posts. Rail caps are placed upon the top rail and posts to give a finished look. The last step to railing are the balusters, placed 4 inches apart, depending on local building code. Stair installation starts with the zig-zag stringers, which can be pre-cut or cut on-site and then bolted to the joists with hangers. Railing posts are installed on the bottom step and the railing is installed like above. Lastly, toe kicks and treads are screwed on the stringers. There are some additional features you could build into your deck to increase its functionality, like lighting or a roof. The décor you place on your deck also impacts its functionality. Remember, you should be thinking about the function you’d like out of your deck while designing it but now is when you actually get to add these features! Adding lighting to your deck is a great way to illuminate your outdoor space during the evening, allowing you more time with your deck every day. You can add stair lighting to make it safer to walk up and down your steps during the night. Post cap lighting can surround your deck, lighting every part of it. Side-mounted post lights will also illuminate your whole deck but do not shine directly into your eyes. You could add a variety of decorative lights that also serve the function of lighting your space, like string lights or lanterns. Adding a roof to your deck is a great way to boost the comfort of your deck. It keeps the rain off of the deck and provides shade from the sun. You can add a roof over the whole deck or create a gazebo on a section of your deck. Another option is to build a pergola instead. This is a structure that supports a roofing grid but does not have an actual roof with shingles. It’s a less expensive alternative to provide shade but does still let the rain fall through. The furniture you add to your deck is what most impacts the functionality of your deck. Do you want to eat summer meals on your deck? Then an outdoor table and seating are for you. Lounge chairs allow you to relax and sunbathe on your deck. If you enjoy hosting parties, then perhaps an outdoor bar will appeal to you. Whatever furniture you settle on, be sure it’s weather resistant. Placing a grill on your deck instantly changes your recreational space into an outdoor kitchen. You can even add a countertop, sink, and/or minifridge to really boost the functionality of your deck! Grilling on the deck is a great way to provide some tasty barbeque for a get together while remaining present with your friends and family. There’s nothing quite like roasting marshmallows on a warm summer’s evening. You can have that experience on your deck by installing a fire pit! When installing your fire pit, it should remain 10-25 feet away from your house and free from any overhanging tree branches. If your deck cannot accommodate these safety recommendations, it’s best to leave the fire pit in the yard. Other types of deck décor include outdoor rugs and potted plants. Outdoor rugs bring a wonderful splash of color to your deck and are built to withstand the elements. Potted plants bring some life to your deck and are shown to boost your mood. Consider adding them to your deck. Once your deck is constructed and decorated, you should keep good care of it with seasonal maintenance – especially if it’s a wooden deck. Performing seasonal maintenance allows you to use it year-round. There are certain steps you should take every fall to keep your deck in good shape. First, inspect your deck for any loose board, rotting wood, or other potential issues. Then, wash your deck with a cleaning solution, making sure to not damage the decking. Lastly, you should re-apply stain and seal the deck to make the wood last longer. If you fail to follow these maintenance tips, you might find yourself in need of restoring your deck after a few years. Re-decking is the process of replacing damaged elements of your deck, while preserving the original structure. It’s a cheaper alternative to entirely re-building the deck. Even when you take good care of your deck, traditional wooden decking should be replaced every 15 years. If you’re looking to build your own dream deck, remember the first step is to find the right contractor to partner with. Decks R Us has been constructing decks for over 20 years. If you live in southeastern Pennsylvania, trust in us to do the job right. We value transparency and you can receive an instant estimate for how much a deck should cost. If you contact us for a consultation, we’ll provide you with an exact quote and stick to it. No hidden fees!The Steps of How to Build Your Dream Deck
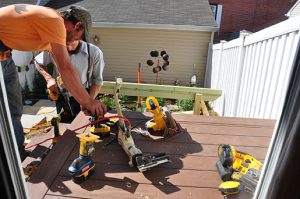
How to Choose a Contractor to Build Your Deck

Understanding Local Regulations Before You Build a Deck

How to Plan and Design Your Dream Deck

What’s the Right Material for Your Deck?
Wood Decking
Composite Decking
Vinyl Decking
Vinyl-Wrapped Composite Decking

How to Construct a New Deck
Attach Ledger and Install Posts
Frame the Deck
Install the Decking, Railing, and Stairs
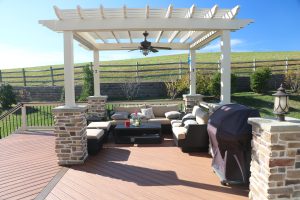
Additional Features & Décor for Your Dream Deck
Lighting
Roof or Pergola
Furniture
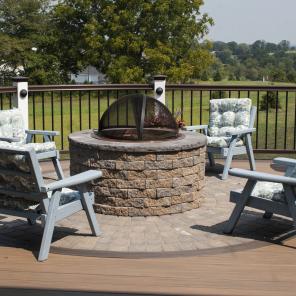
Grill
Fire Pit
Other Décor
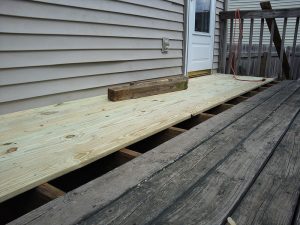
How to Maintain Your Deck Year-Round
Ready to Start Building Your Dream Deck?
